Here, I have created a video to display the difference between two clips. One that is just the RAW video file and then one that has been edited to look more cinematic by changing the ratio and colour correcting it. I added these effects very easily with the built in functions of Sony Vegas.
The main reason for testing these effects are to portray how simple changes can add more atmosphere and intense tone to a simple clip.
How I Done It
Letter boxing
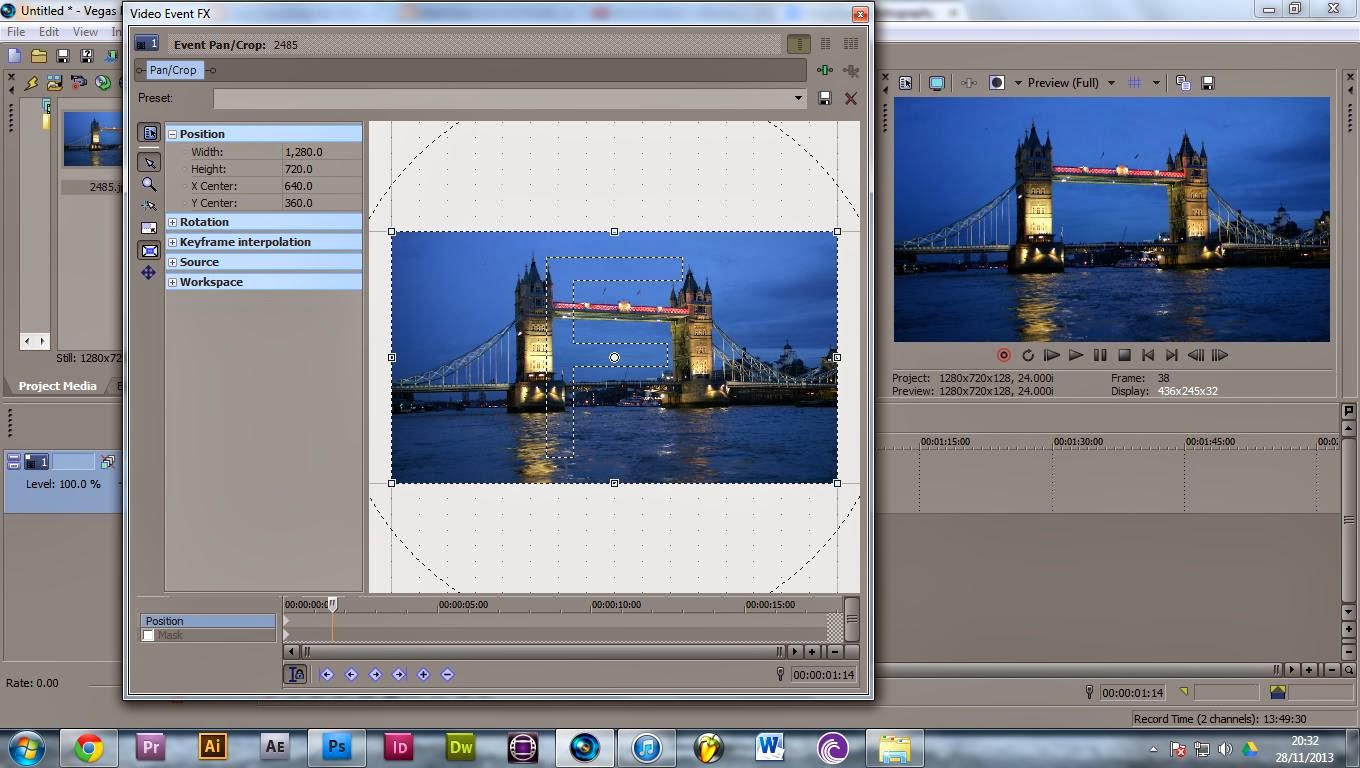
Changing the screen ratio is extremely easy within Sony Vegas. Each clip on the timeline has a set of buttons, and to change the ratio you select the "Event/Pan Crop" button. This will take you to the screen shown (left)
You can drag the guidelines manually to your liking. Your result is shown in the preview screen on the right hand side so you can see what changes are being made. You can also change the ratio by typing/editing the "height" & "width" on the left of the screen. The ratio is 2:35.1, which turns 1280x720 to 1280x544.7 and creates the cinematic wide screen which is shown below.
Colour Correction
There are several different ways of manipulating the colour and tone of a video. This could be via changing the brightness/contrast, colour curves, saturation etc. The way I edited my clip was by the basic colour correction plug-ins, built in to Sony Vegas. There are hundreds of third party applications for more precises correction but the basics are all integrated within every editor.
The way you colour cortrect, is by adjusting the "Low", "Mid", and "High" colours as well as the saturation, alpha, gain, offset and gama. The best way to get the best result is just by trial and error as each clip is lit differently and will require unique settings.


No comments:
Post a Comment